Anatomy of a Clay Man
This summer semester, I decided to use one of my carefully horded grad electives to take Professor Hudson's Constructive Anatomy Course. Sarah had taken it previously, and I'd observed a small portion of her long hours slaving over it. She'd told me that it was a fantastic class, super helpful, but warned me that it was a bit back heavy. I did not heed her warning strongly enough.
I'm going to cover this later, but it's important that comic artists understand anatomy. Even work as cartoony as mine needs a strong foundation. I'd spent years teaching myself anatomy from books, Loomis and Vilppu and Bridgeman, and Hogarth, and I had a fair understanding of how the body worked. This class went far beyond that.
We started with the primative forms. The basic building blocks- a rough hewn head, a rocket's bell for the ribcage, a strange cup thing for the pelvis. Fairly straightforward. We took reference photos from a figure model (which I will not include in this blog, as I've signed a contract with the model. I wouldn't anyway, that'd be weird, go find your own model), and from there we were to reconstruct the poses in graphite and ecroche. Some were more successful than others (some were extremely successful, like Jackie 's). From there we applied clay in carefully constructed muscles to plastic skeletons we were loaned for the class, and applied muscles to our ecroches at home. To say the end of the semester was a mad dash is an understatement, and in the last few days, I wasn't sure I'd make it past the finished line, but the semester is over and all my work was turned in on time. I thought it'd be fun to share with you guys something that isn't sketches or comics.
 3B and 6B graphite on vellum tracing paper. Primitive forms. We had to do six sets of these.

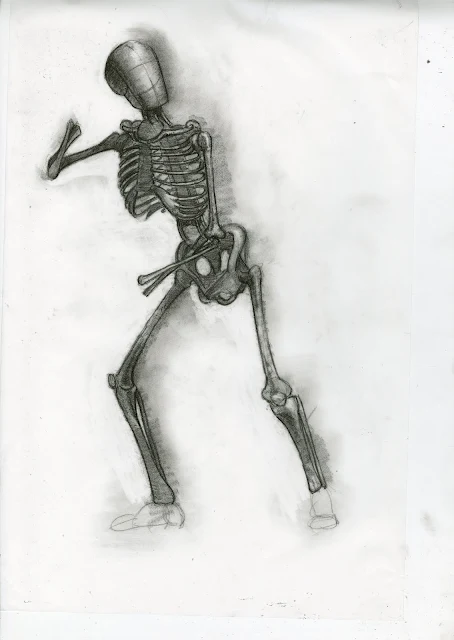
Basic skeleton. The ribs are the hardest part for me, but the arm and leg bones are the most fun.
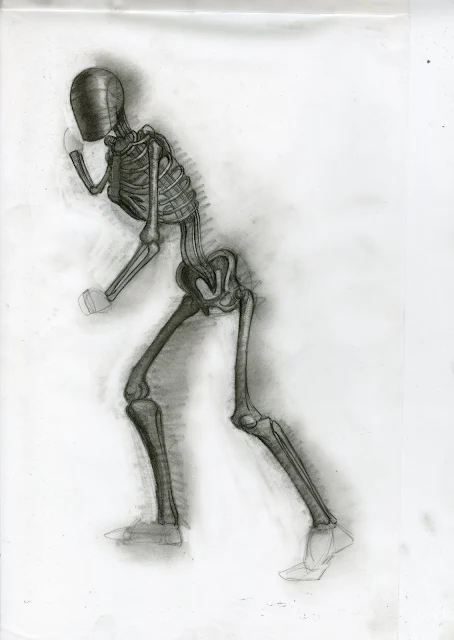
Next comes muscles. I think I missed scanning this one for this set, so I'm going to have to do that later and amend this post. The quality will be poorer, because instead of using Norris's 2k scanner, I'll be using my $300 scanner. Makes a huge difference.

 The muscles were the hardest part in general. I couldn't rely on my ecroche for these forms, as I'd changed the pose to keep the clay from falling off of it. So I had to reference everything. I had Goldfinger's Human Anatomy open, as well as Loomis's Figure Drawing For All It's Worth. Once things were blocked in, it was easy, as all I had to do was render. Easy does not mean fast though, each of these took two hours (at least) to finish).


I photographed my ecroche all states of progress, but in retrospect, that might be a bit overwhelming for you guys. I'll post the finished piece, and if theres' interest, I'll do a post about actually building it.
My ecroche's skeleton is armature wire with a bit of LokTite epoxy. He's fairly sturdy, he needed to be because there's about six blocks of Van Aiken clay on him. I strongly recommend AGAINST Van Aiken for this sort of application, it gets runny when it's too hot and grainy if it's just a wee bit cold, making it difficult to work with in class (too cold) and at home (too hot). Transportation was a concern for both the skeleton and the ecroche as I drove to class alone, I had to just lay the skeleton on the backseat, wrap a light summer scarf around him, and tie that scarf to the seatbelt and hope for the best. I had to redo muscles several times because they just fell off.
Skeleton:


My Canon takes awful pictures with the flash off, sorry.
I'm going to cover this later, but it's important that comic artists understand anatomy. Even work as cartoony as mine needs a strong foundation. I'd spent years teaching myself anatomy from books, Loomis and Vilppu and Bridgeman, and Hogarth, and I had a fair understanding of how the body worked. This class went far beyond that.
We started with the primative forms. The basic building blocks- a rough hewn head, a rocket's bell for the ribcage, a strange cup thing for the pelvis. Fairly straightforward. We took reference photos from a figure model (which I will not include in this blog, as I've signed a contract with the model. I wouldn't anyway, that'd be weird, go find your own model), and from there we were to reconstruct the poses in graphite and ecroche. Some were more successful than others (some were extremely successful, like Jackie 's). From there we applied clay in carefully constructed muscles to plastic skeletons we were loaned for the class, and applied muscles to our ecroches at home. To say the end of the semester was a mad dash is an understatement, and in the last few days, I wasn't sure I'd make it past the finished line, but the semester is over and all my work was turned in on time. I thought it'd be fun to share with you guys something that isn't sketches or comics.


Basic skeleton. The ribs are the hardest part for me, but the arm and leg bones are the most fun.
Next comes muscles. I think I missed scanning this one for this set, so I'm going to have to do that later and amend this post. The quality will be poorer, because instead of using Norris's 2k scanner, I'll be using my $300 scanner. Makes a huge difference.


I photographed my ecroche all states of progress, but in retrospect, that might be a bit overwhelming for you guys. I'll post the finished piece, and if theres' interest, I'll do a post about actually building it.
My ecroche's skeleton is armature wire with a bit of LokTite epoxy. He's fairly sturdy, he needed to be because there's about six blocks of Van Aiken clay on him. I strongly recommend AGAINST Van Aiken for this sort of application, it gets runny when it's too hot and grainy if it's just a wee bit cold, making it difficult to work with in class (too cold) and at home (too hot). Transportation was a concern for both the skeleton and the ecroche as I drove to class alone, I had to just lay the skeleton on the backseat, wrap a light summer scarf around him, and tie that scarf to the seatbelt and hope for the best. I had to redo muscles several times because they just fell off.
Skeleton:


My Canon takes awful pictures with the flash off, sorry.
Comments
Post a Comment